How to Setup the Company Tabs in Namely Payroll
How to create and edit branches, departments, divisions, and classes in Namely Payroll and HCM.
Payroll: Creating Branches at the Company Level
To begin setting up a payroll branch at the company level:
-
On the Namely homepage, click Company.
-
Click Branch.
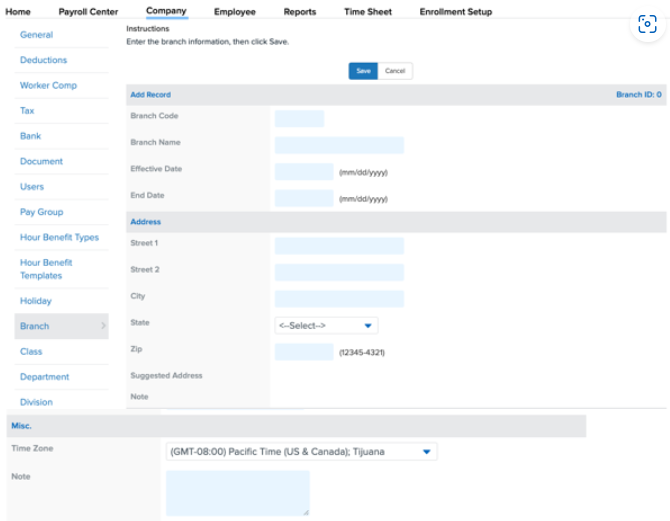
Add a Branch
To add a branch in payroll:
-
Click Add.
-
Enter a Branch Code.
-
Enter a Branch Name.
-
Enter an Effective Date.
-
Enter the branch's Address.
-
Select a Time Zone.
-
Click Save.
Payroll: Creating Departments at the Company Level
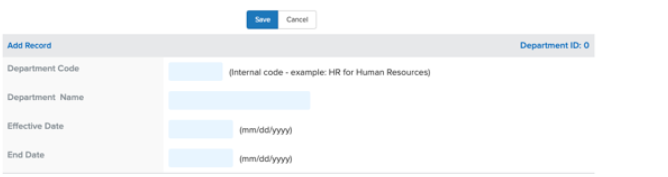
Add a Department
To add a department in payroll:
-
Click Add.
-
Enter a Department Code.
-
Enter a Department Name.
-
Enter an Effective Date.
Payroll: Creating Divisions at the Company Level
Add a Division
To add a division in payroll:
-
Click Add.
-
Enter a Division Code.
-
Enter a Division Name.
-
Enter an Effective Date.
-
Click Save.

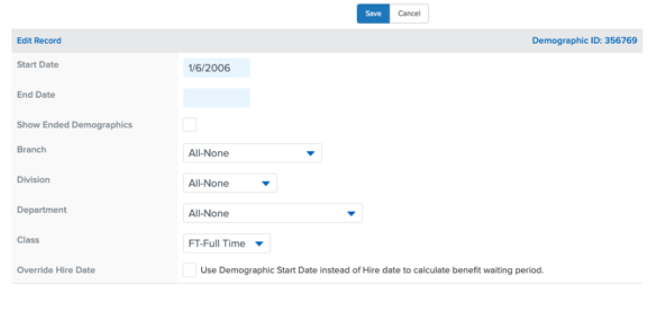
Editing an Employees Branch, Class, Division, and Department
To edit an employee's demographics:
-
In payroll, click Employee.
-
Select an employee.
-
Click Demographic.
-
Click Edit.
-
Use the dropdown menus to select a Branch, Division, and Department.
-
Click Save.
To edit an employee's class:
Your company’s classes can be viewed in Payroll by going to Company > Class, however, you can’t add any new classes, or make any changes to existing classes—access is read-only.
-
To view all classes at your company, including deactivated ones, select All.
-
To view only active classes, select Active.
If you need to make changes to your classes, click the Classes link in the note at the top of the page to be brought to HCM.

Multi-EIN Clients
If you have multiple payroll companies, your classes are shared among your EINs. Any classes created in HCM will flow into each of your subsidiaries’ payroll sites with no additional setup required.
Employee Assignments
No changes are being made to the assigning of classes to employees with this release. Currently, class assignments for employees are made in Payroll under Employee > Demographic.
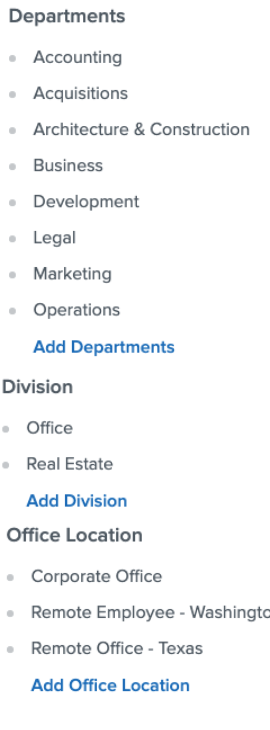
HCM: Add Branches, Departments, Divisions and Classes at the Company Level
Note: Clients whose HCM sites were created on or after April 15, 2019, use Org Types and Org Units for their demographic information in HCM. See Org Types and Org Units.
To set up an HCM branch, department and division at the company level:
-
On the Namely homepage, click Company.
-
Click Settings.
-
Click Groups.
-
Click Add on any section to add additional options.
Accessing Company Classes
Prior to August 21, 2019, a company’s classes were created and managed in Payroll. As part of our commitment to better unify our HR and payroll services, all classes at the company-level will now be managed in HCM.
To access company classes:
-
In the navigation menu, click Company.
-
Click Settings.
-
Click Classes.
Note: Your ability to access company classes is determined by the Company settings classes permission in your organization’s roles and permissions. All users with the Administrator or HR Administrator roles, whose sites were created after August 12, 2019have the permission turned on by default, however, it can be turned on or off for any access role as needed.
The Company settings classes permission will only display for companies that have either the Use Trax Payroll or the Use Trax Benefits feature flags turned on. As a result, HCM-only clients won’t have access to classes.
Default Classes
All new sites have two classes created by default, Full Time and Part Time.
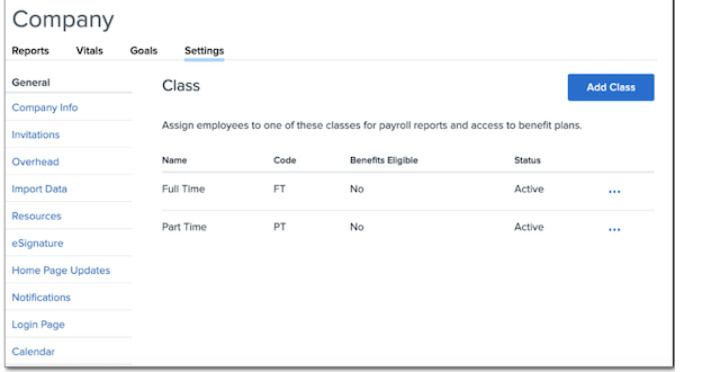
By default, neither class is eligible for benefits, however, all default class settings, including the class’ name, code, and benefits eligibility, can be edited at any time.
While HCM-only sites won’t have access to view classes, the Full Time and Part Time default classes will still be created during implementation on the site’s backend. This will allow for an easier transition should the client add payroll or benefits at a later date.
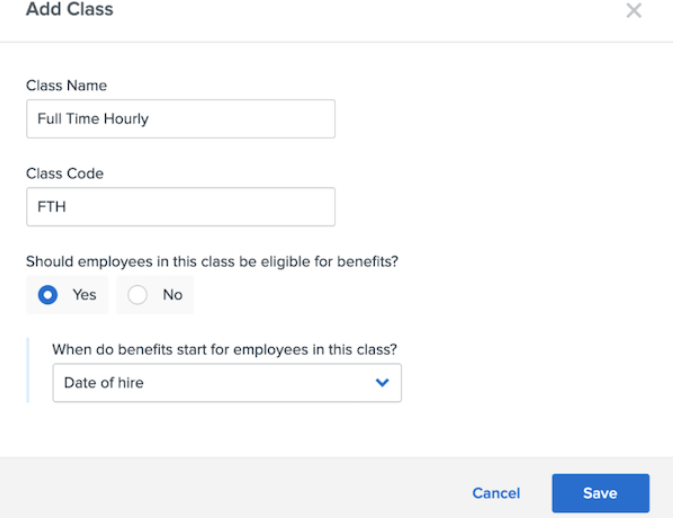
Add a Class
To add a new class:
-
Click Add Class.
-
Enter a Class Name.
-
You can’t enter a class name that is the same as an already active or deactivated class.
-
The class name can’t be greater than 50 characters.
-
The class name can include spaces, letters, numbers, and symbols.
-
-
Enter a Class Code.
-
You can’t enter a class code that is the same as an already active or deactivated class.
-
The class code can’t be greater than eight characters.
-
The class name can include spaces, letters, numbers, and symbols.
-
If you select Yes, and are a benefits client, select when benefits for the employee start:
-
-
Select whether employees in the class are eligible for benefits.
-
On the date of hire
-
On the first of the month following a defined number of days or months
-
If you select this option, you’ll also have to select whether the employee has to wait an additional month if the wait period ends on the first day of the month.
-
-
On the first or 15th of the month (whichever comes first) following a defined number of day.
-
If you select this option, you’ll also have to select whether the employee has to wait an additional month if the wait period ends on the first day of the month.
-
-
An exact number of days or months following the date of hire
-
-
Click Save.
HCM: Edit Branches, Departments, Divisions and Class at the Company Level
To edit an HCM branch, department, and division at the company level:
-
Hover over the title and Select Edit to edit or delete.
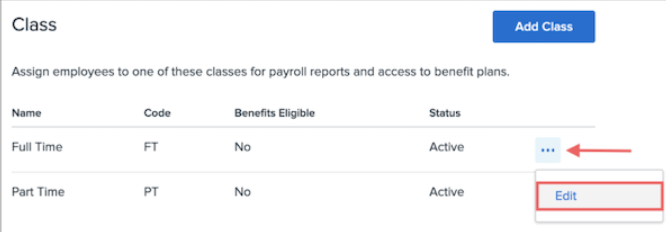
To edit an HCM classes at the company level:
-
Click the three dots next to the class you want to edit.
-
Click Edit.
-
Make any desired changes to the Class Name, Class Code, or benefits eligibility.
-
Click Save.
Deactivating Classes

Please note that classes currently can’t be deactivated. Clients who have existing deactivated classes will see them displayed with an Inactive status, but will not be able to reactivate or edit them.
An update to provide the ability to deactivate and reactivate classes is scheduled to be released in Q4 of 2019.
Company Class in Payroll
Your company’s classes can be viewed in Payroll by going to Company > Class, however, you can’t add any new classes, or make any changes to existing classes—access is read-only.
-
To view all classes at your company, including deactivated ones, select All.
-
To view only active classes, select Active.
If you need to make changes to your classes, click the Classes link in the note at the top of the page to be brought to HCM.